Chrysler PT Cruiser Repair Manual 2001-2010 - Chilton 20390
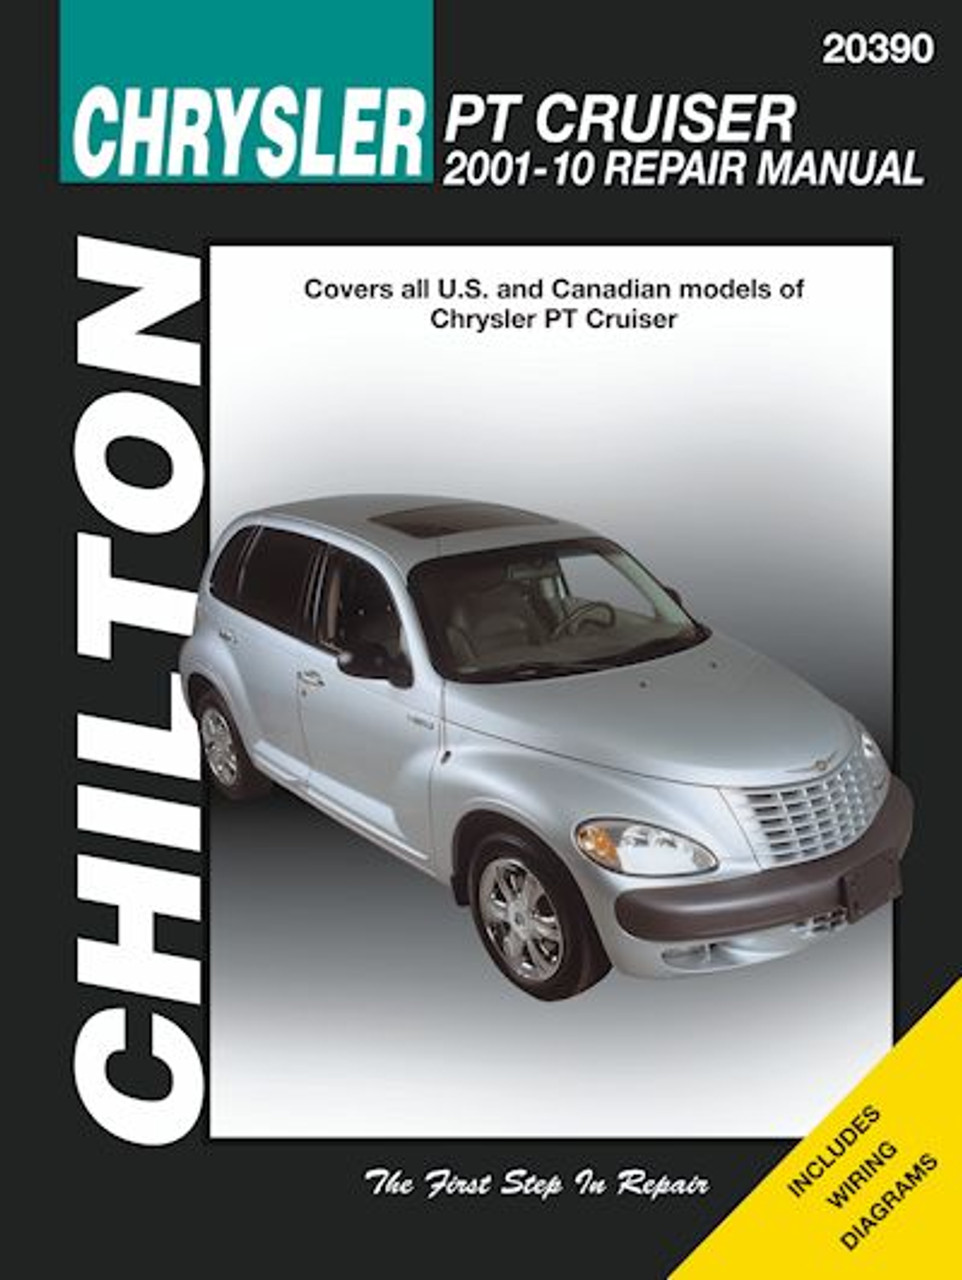
This repair and service DIY manual covers 2001-2010 Chrysler PT Cruiser automobiles. Chilton 20390.
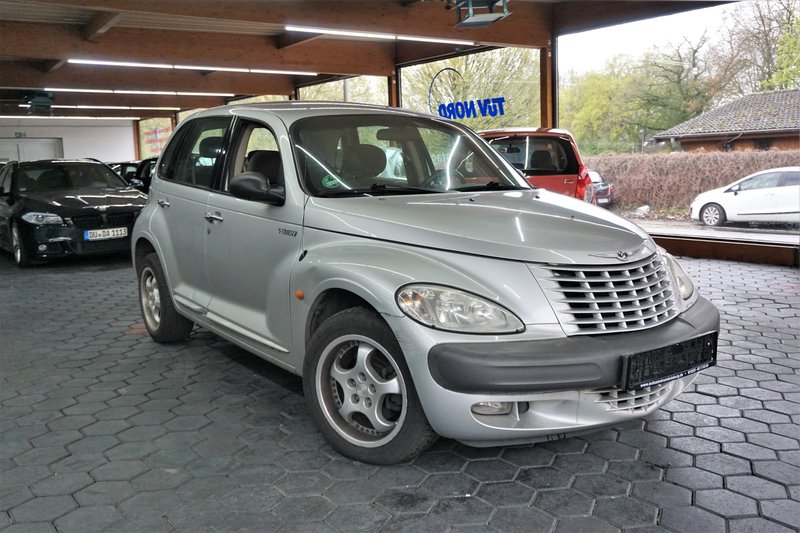
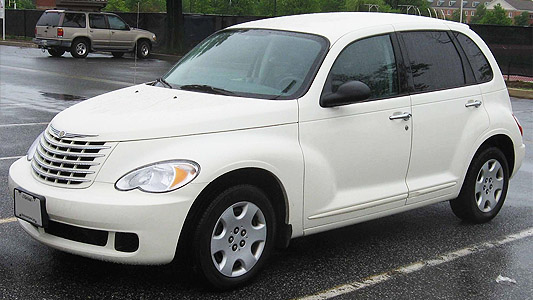
The 2001-2010 Chrysler PT Cruiser Repair Manual by Chilton, covers U.S. and Canadian models. PT Cruisers are only available in four-door, liftgate-type body style, and are powered by a four-cylinder, dual-overhead camshaft (DOHC) engine with sequential multi-port fuel injection. A turbocharged PT Cruiser version was offered starting with the 2003 model. CUSTOMER REVIEW: I purchased this manual to repair the multi-function switch on the steering column and was able to do so using this manual as a guide. I also found useful information on any other repairs that I might need to do in the future. andmdash; Mike Hutcheson | Pasadena, CA Book Excerpt: 2001-2010 Chrysler PT Cruiser Repair Manual ENGINES VALVE COVER | REMOVAL AND INSTALLATION REMOVAL Disconnect the cable from the negative battery terminal (see Chapter 5). Remove the upper intake manifold (see Section 5). Remove the ignition coil pack from the valve cover (see Chapter 5). Clearly label and detach any electrical wiring harnesses which connect to or cross over the valve cover. Disconnect the PCV valve hose and breather hose from the valve cover (see Chapter 6). Remove the valve cover bolts and lift off the cover. If the cover sticks to the cylinder head, tap on it with a soft-face hammer or place a wood block against the cover and tap on the wood with a hammer. CAUTION! If you have to pry between the valve cover and the cylinder head, be extremely careful not to gouge or nick the gasket surfaces of either part. A leak could develop after reassembly. NOTE: Do not interchange the two center bolts with the seven perimeter bolts. The two center bolts contain a special aluminum sealing washer. CAUTION! If you have to pry between the valve cover and the cylinder head, be extremely careful not to gouge or nick the gasket surfaces of either part. A leak could develop after reassembly. Remove the valve cover perimeter rubber seal. Thoroughly clean the valve cover and remove all traces of old gasket material. Gasket removal solvents are available from auto parts stores and may prove helpful. After cleaning the surfaces, degrease them with a rag soaked in lacquer thinner or acetone. INSTALLATION (Refer to illustrations 4.8, 4.9 and 4.10) Inspect the spark plug tube seals (see illustration) for deterioration and hardness. Replace them if necessary. Install a new gasket on the cover, using RTV sealant to hold it in place (see illustration). Apply RTV sealant to the camshaft cap corners and the top edges of the half-round seal. Place the cover on the engine and install the cover bolts. BRAKES GENERAL INFORMATION (Refer to illustration 2.2) The anti-lock brake system is designed to maintain vehicle steerability, directional stability and optimum deceleration under severe braking conditions on most road surfaces. It does so by monitoring the rotational speed of each wheel and controlling the brake line pressure to each wheel during braking. This prevents the wheels from locking up. The ABS system has three main components - the wheel speed sensors, the electronic control unit (ECU) and the hydraulic unit (see illustration). Four wheel speed sensors - one at each wheel - send a variable voltage signal to the control unit, which monitors these signals, compares them to its program and determines whether a wheel is about to lock up. When a wheel is about to lock up, the control unit signals the hydraulic unit to reduce hydraulic pressure (or not increase it further) at that wheel's brake caliper. Pressure modulation is handled by electrically-operated solenoid valves. If a problem develops within the system, an ABS warning light will glow on the dashboard. Sometimes, a visual inspection of the ABS system can help you locate the problem. Carefully inspect the ABS wiring harness. Pay particularly close attention to the harness and connections near each wheel. Look for signs of chafing and other damage caused by incorrectly…
The%202001-2010%20Chrysler%20PT%20Cruiser%20Repair%20Manual%20by%20Chilton%2C%20covers%20U.S.%20and%20Canadian%20models.%20%20PT%20Cruisers%20are%20only%20available%20in%20four-door%2C%20liftgate-type%20body%20style%2C%20and%20are%20powered%20by%20a%20four-cylinder%2C%20dual-overhead%20camshaft%20(DOHC)%20engine%20with%20sequential%20multi-port%20fuel%20injection.%20%20A%20turbocharged%20PT%20Cruiser%20version%20was%20offered%20starting%20with%20the%202003%20model.%20%20%20%20%20CUSTOMER%20REVIEW%3A%20%20I%20purchased%20this%20manual%20to%20repair%20the%20multi-function%20switch%20on%20the%20steering%20column%20and%20was%20able%20to%20do%20so%20using%20this%20manual%20as%20a%20guide.%20I%20also%20found%20useful%20information%20on%20any%20other%20repairs%20that%20I%20might%20need%20to%20do%20in%20the%20future.%20%20andmdash%3B%20Mike%20Hutcheson%20%7C%20Pasadena%2C%20CA%20%20%20%20%20%20Book%20Excerpt%3A%202001-2010%20Chrysler%20PT%20Cruiser%20Repair%20Manual%20%20ENGINES%20%20VALVE%20COVER%20%7C%20REMOVAL%20AND%20INSTALLATION%20%20%20REMOVAL%20%20%20Disconnect%20the%20cable%20from%20the%20negative%20battery%20terminal%20(see%20Chapter%205).%20%20%20%20Remove%20the%20upper%20intake%20manifold%20(see%20Section%205).%20%20%20%20Remove%20the%20ignition%20coil%20pack%20from%20the%20valve%20cover%20(see%20Chapter%205).%20%20%20%20Clearly%20label%20and%20detach%20any%20electrical%20wiring%20harnesses%20which%20connect%20to%20or%20cross%20over%20the%20valve%20cover.%20%20%20%20Disconnect%20the%20PCV%20valve%20hose%20and%20breather%20hose%20from%20the%20valve%20cover%20(see%20Chapter%206).%20%20%20%20Remove%20the%20valve%20cover%20bolts%20and%20lift%20off%20the%20cover.%20If%20the%20cover%20sticks%20to%20the%20cylinder%20head%2C%20tap%20on%20it%20with%20a%20soft-face%20hammer%20or%20place%20a%20wood%20block%20against%20the%20cover%20and%20tap%20on%20the%20wood%20with%20a%20hammer.%20%20%20CAUTION!%20If%20you%20have%20to%20pry%20between%20the%20valve%20cover%20and%20the%20cylinder%20head%2C%20be%20extremely%20careful%20not%20to%20gouge%20or%20nick%20the%20gasket%20surfaces%20of%20either%20part.%20A%20leak%20could%20develop%20after%20reassembly.%20%20%20NOTE%3A%20Do%20not%20interchange%20the%20two%20center%20bolts%20with%20the%20seven%20perimeter%20bolts.%20The%20two%20center%20bolts%20contain%20a%20special%20aluminum%20sealing%20washer.%20%20%20CAUTION!%20%20If%20you%20have%20to%20pry%20between%20the%20valve%20cover%20and%20the%20cylinder%20head%2C%20be%20extremely%20careful%20not%20to%20gouge%20or%20nick%20the%20gasket%20surfaces%20of%20either%20part.%20A%20leak%20could%20develop%20after%20reassembly.%20%20Remove%20the%20valve%20cover%20perimeter%20rubber%20seal.%20Thoroughly%20clean%20the%20valve%20cover%20and%20remove%20all%20traces%20of%20old%20gasket%20material.%20%20Gasket%20removal%20solvents%20are%20available%20from%20auto%20parts%20stores%20and%20may%20prove%20helpful.%20After%20cleaning%20the%20surfaces%2C%20degrease%20them%20with%20a%20rag%20soaked%20in%20lacquer%20thinner%20or%20acetone.%20%20%20INSTALLATION%20%20(Refer%20to%20illustrations%204.8%2C%204.9%20and%204.10)%20%20%20%20Inspect%20the%20spark%20plug%20tube%20seals%20(see%20illustration)%20for%20deterioration%20and%20hardness.%20Replace%20them%20if%20necessary.%20%20%20%20Install%20a%20new%20gasket%20on%20the%20cover%2C%20using%20RTV%20sealant%20to%20hold%20it%20in%20place%20(see%20illustration).%20Apply%20RTV%20sealant%20to%20the%20camshaft%20cap%20corners%20and%20the%20top%20edges%20of%20the%20half-round%20seal.%20Place%20the%20cover%20on%20the%20engine%20and%20install%20the%20cover%20bolts.%20%20%20%20%20BRAKES%20%20GENERAL%20INFORMATION%20%20(Refer%20to%20illustration%202.2)%20%20%20The%20anti-lock%20brake%20system%20is%20designed%20to%20maintain%20vehicle%20steerability%2C%20directional%20stability%20and%20optimum%20deceleration%20under%20severe%20braking%20conditions%20on%20most%20road%20surfaces.%20It%20does%20so%20by%20monitoring%20the%20rotational%20speed%20of%20each%20wheel%20and%20controlling%20the%20brake%20line%20pressure%20to%20each%20wheel%20during%20braking.%20This%20prevents%20the%20wheels%20from%20locking%20up.%20%20%20%20The%20ABS%20system%20has%20three%20main%20components%20-%20the%20wheel%20speed%20sensors%2C%20the%20electronic%20control%20unit%20(ECU)%20and%20the%20hydraulic%20unit%20(see%20illustration).%20Four%20wheel%20speed%20sensors%20-%20one%20at%20each%20wheel%20-%20send%20a%20variable%20voltage%20signal%20to%20the%20control%20unit%2C%20which%20monitors%20these%20signals%2C%20compares%20them%20to%20its%20program%20and%20determines%20whether%20a%20wheel%20is%20about%20to%20lock%20up.%20%20When%20a%20wheel%20is%20about%20to%20lock%20up%2C%20the%20control%20unit%20signals%20the%20hydraulic%20unit%20to%20reduce%20hydraulic%20pressure%20(or%20not%20increase%20it%20further)%20at%20that%20wheel's%20brake%20caliper.%20Pressure%20modulation%20is%20handled%20by%20electrically-operated%20solenoid%20valves.%20%20%20%20If%20a%20problem%20develops%20within%20the%20system%2C%20an%20%22ABS%22%20warning%20light%20will%20glow%20on%20the%20dashboard.%20Sometimes%2C%20a%20visual%20inspection%20of%20the%20ABS%20system%20can%20help%20you%20locate%20the%20problem.%20Carefully%20inspect%20the%20ABS%20wiring%20harness.%20%20Pay%20particularly%20close%20attention%20to%20the%20harness%20and%20connections%20near%20each%20wheel.%20Look%20for%20signs%20of%20chafing%20and%20other%20damage%20caused%20by%20incorrectly%20routed%20wires.%20If%20a%20wheel%20sensor%20harness%20is%20damaged%2C%20the%20sensor%20must%20be%20replaced.%20%20%20%20%20Subject%3A%202001%2C%202002%2C%202003%2C%202004%2C%202005%2C%202006%2C%202007%2C%202008%2C%202009%2C%202010%20Chrysler%20PT%20Cruiser%20service%2C%20maintenance%2C%20repair.%20ISBN-10%3A%201620920298%20%7C%20ISBN-13%3A%209781620920299%20%7C%20Chilton%2020390TABLE%20of%20CONTENTS%3A%0A%0AIntroduction%3A%20About%20this%20manual%20%7C%20Introduction%20%7C%20Vehicle%20identification%20numbers%20%7C%20Maintenance%20techniques%2C%20tools%20and%20working%20facilities%20%7C%20%20Buying%20parts%20%7C%20Jacking%20and%20towing%20%7C%20Booster%20battery%20(jump)%20starting%20%7C%20Conversion%20factors%20%7C%20Automotive%20chemicals%20and%20lubricants%20%7C%20Safety%20first!%20%7C%20Troubleshooting%0A%0A%20Tune-up%20and%20routine%20maintenance%0A%20General%20engine%20and%20overhaul%20procedures%0A%20Cooling%2C%20heating%20and%20air-conditioning%20systems%0A%20Fuel%20and%20exhaust%20systems%0A%20Engine%20electrical%20systems%0A%20Emissions%20control%20systems%0A%205-speed%20manual%20transaxle%0A%204-speed%20automatic%20transaxle%0A%20Clutch%20and%20driveaxles%0A%20Brakes%20(power-assisted%20and%20ABS)%0A%20Suspension%20and%20steering%20systems%0A%20Body%0A%20Chassis%20electrical%20system%0A%20Wiring%20diagrams

Chrysler PT Cruiser 2001-2003: Chilton's Total Car Care Repair Manuals Chilton
Chrysler repair and workshop manuals, Haynes

Pt Cruiser - New Zealand

Chrysler PT Cruiser Service Manual 2001-2005 PDF

Chilton Chrysler PT Cruiser 2001 - 03 Repair Manual 20390 Do It Yourself Book
With Haynes Digital Manuals, you get all the trusted content of a Haynes printed manual but with added features to help you get the job done right.

Chrysler PT Cruiser (01-10) Haynes Online Manual

Chrysler PT Cruiser, 2001-10 Repair Manual: Covers All U.s. and Canadian Models of Chrysler Pt Cruiser (Chilton's Total Car Care) : Haynes Publishing Group: : Bücher
Baujahre: 2001 - 2010. Originale Reparaturanleitung Chrysler PT Cruiser / Repair Manual. Chrysler PT Cruiser. Manual Transaxle. Cooling, heating and

Reparaturanleitung Chrysler PT Cruiser Baujahre 2001 - 2010 Repair Manual!
Manual # 20390. Chilton Chrysler PT Cruiser Repair Manual. Years - 2001 - 2003.

Chilton Chrysler PT Cruiser 2001 - 03 Repair Manual 20390 Do It Yourself Book
Chrysler PT Cruiser 2001-2010 Workshop Repair Manual Download PDF
Manual # 20390. Chilton Chrysler PT Cruiser Repair Manual. Years - 2001 - 2003.

Chilton Chrysler PT Cruiser 2001 - 03 Repair Manual 20390 Do It Yourself Book
Chrysler PT Cruiser Repair Manual - Vehicle - Best Repair Manual - Vehicle for Chrysler PT Cruiser